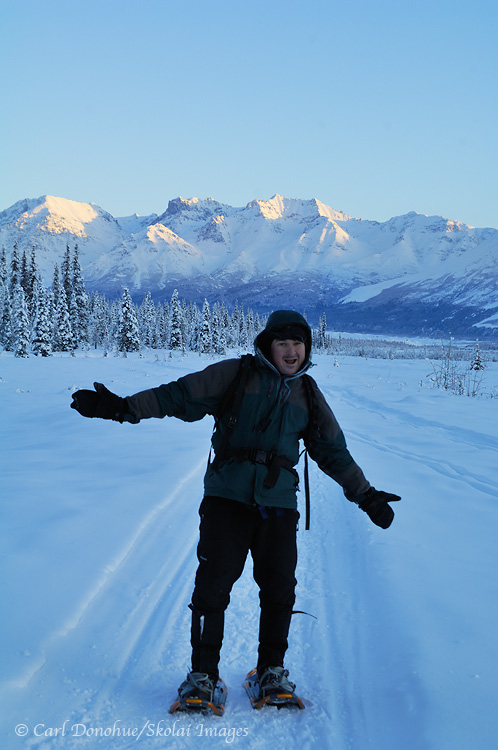
Snowshoeing in winter in the boreal forest of Wrangell-St. Elias National Park and Preserve, Alaska.
A Holiday Season Special – Spring Equinox Celebration
Please note: – 10:00pm Jan 17th; entries are now closed. The drawing takes place the morning of the 18th – see below for details!!!
OK, this one is so simple it’s ridiculous.
In the best of the holiday spirit, here’s what I’m doing. I’m offering a free trip to Wrangell – St. Elias National Park. This offer is open to any who who think they’d enjoy a trip like this. The more people that enter, the more people will win.
If fewer than 250 people enter, I’ll give away a trip for free to 2 people. If I get more than 250 people enter, I’ll give away 4 free spots on the trip.
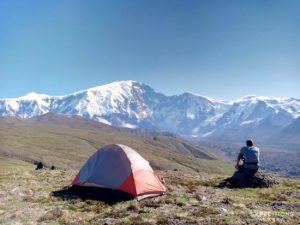
Wrangell – St. Elias National Park. 6 nights in a backcountry cabin; days spent snowshoeing, cross country skiing, and/or hiking, enjoying some winter landscape photography, possible northern lights photography and the quietest, peaceful-est cabin you never been to. Here’s what you need to know.
The Trip
We leave Anchorage, drive 5 hours to Wrangell-St. Elias National Park. 5 nights in the cabin, March 18-23, and return to Anchorage on March 24. During the day, we can either snowshoe, cross country ski, or, depending on weather and snow conditions, hike.
We’ll have the van nearby so we can easily saunter down to the van, drive 10 miles down the road, snowshoe all day, drive back to the cabin and enjoy the comfort of a wood stove, hot food and a quiet like no other. Next day, we can do the same in the other direction.
The exploratory opportunities are literally endless here. Winter landscape photography opportunities abound. This is a massive landscape; Mt Sanford rises over 16 000′ right out the window. It’s also an intimate boreal forest, for some great shooting opportunities. There’s a decent chance of seeing moose in the area, and possibly caribou. The northern lights are a strong possibility; displays are typically strongest and most active right around the Equinox, so this timing is optimal for great northern lights viewing/photography. There are never any guarantees with the aurora, of course.
Price:Normally $1400.00 per person, this year 2, or possibly 4 people get to come out for free.
Dates: March 18-23, 2012
My holiday gift and thank you to everyone who’s supported what I do.
I’d like to take a few minutes to say thanks so much to everyone for a really great year this year. We had some fantastic adventures, I met some wonderful people, and am so grateful to you all for coming out, as always. It really means a lot to me that so many people come out and share this amazing place with me. Thank you.
And I’d like to wish everyone the absolute happiest of holidays, and all of my very best to each of you for the coming New Year.
One question I receive at least a few times every year concerns hiking poles, or trekking poles, so I thought it might be a good choice to write about here on the blog.
In short, I can’t recommend hiking poles enough for anyone interested in doing some backpacking here in Alaska. I use one, a Leki Makalu that I’ve had for more years than I care to think about. And I bring it every time I’m backpacking in Alaska; every time.
Most folks, of course, use 2, and I think that’s probably a sound way to go. I use one, and that’s what works for me. But 2 is probably a good call.
Hiking poles benefit you so much hiking off trail, which is what most Alaska backcountry travel is. Science Daily had a great article recently about this. — “trekking-poles help hikers maintain muscle function while significantly reducing soreness in the days following a hike”. Continue reading…
We’ll end the “Image of the Month” series for 2011 with a look at my favorite mountain; Mt. St. Elias. Taken after sunset from Icy Bay, Wrangell-St. Elias National Park and Preserve.
Have a great holiday season everyone, and all the best for the the coming year. Let’s make it a big one, eh?
One topic I thought I might write about here that readers might enjoy has to do with navigation; every backcountry traveler has had issues with getting lost, even if only briefly, and being unsure of direction. So we learn how to read a compass and topographic map. And w learn how to pay attention to our terrain and landscape. We learn about geology and landform features to help us navigate. We learn how to pay attention to the sky, and the sun. Some of us even look skyward after dark and learn to read the constellations.
More recently, we’ve acquired and learned GPS technologies, for pinpoint accuracy, and for better navigation in adverse situations (clouds and fog, flat, featureless terrain, etc). But even this amazing GPS stuff is years old now. So what’s the “new” navigation technology? Continue reading…
Part 3 of my complete guide on aurora borealis photography. So far, on Page 1, we’ve covered the initial stuff. Finding the aurora borealis, scouting your locations during the day to find potential composition sites, what clothes you need to keep warm and comfortable, the importance of bringing along a good headlamp.
Page 2 addresses the question of what camera gear you need when photographing the northern lights, and what camera settings are most useful. Page 2 also covers a broader range of issues you’re likely to run into, like how to find critical focus in the dark northern sky. Page 3, to wrap things up, begins with some thoughts on composing your aurora borealis photos.
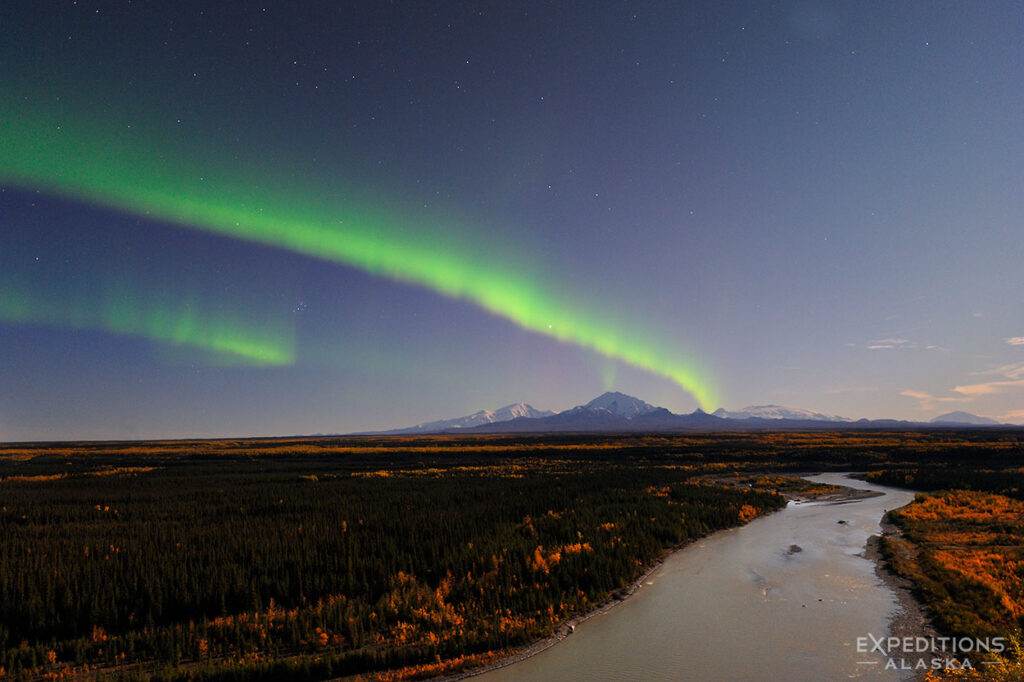
Northern lights over Mt. Denali, Denali National Park.
Hey Folks
Page 2 of my complete guide to photographing the northern lights. We got started on Page 1 with a discussion on where you might find the aurora borealis, and then on scouting your locations during the day. Clothing to keep you warm in the cold polar winter and the importance of a good headlamp choice round out Page 1. We’ll start this page with a look at camera gear choices and considerations.
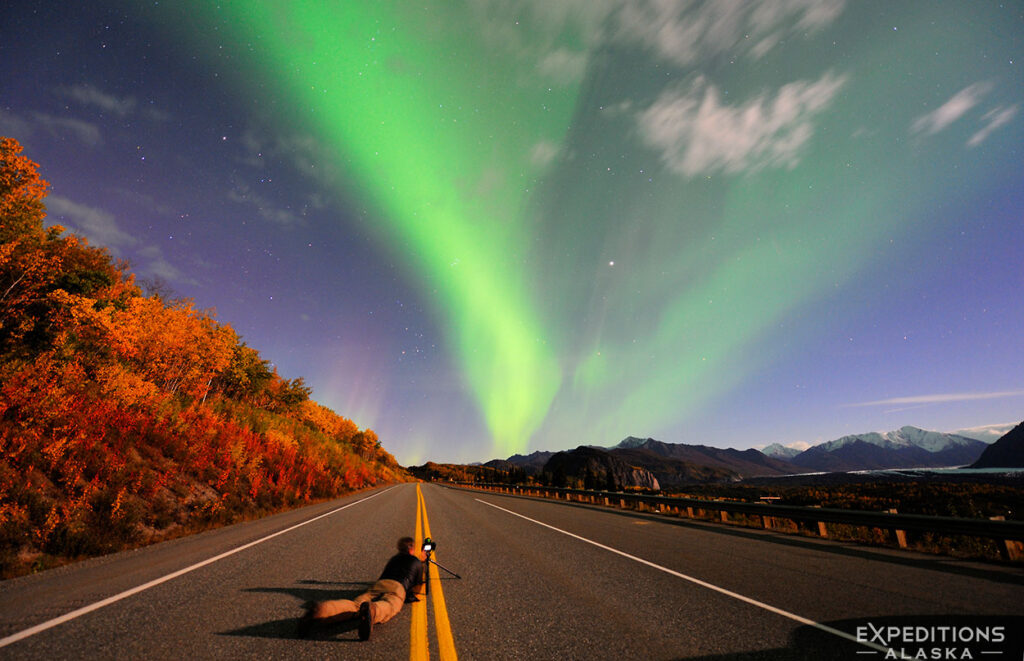
Photographing the aurora borealis in September, surrounded by fall colors, Chugach Mountains, Glenn Highway, Alaska.
Hey Folks,
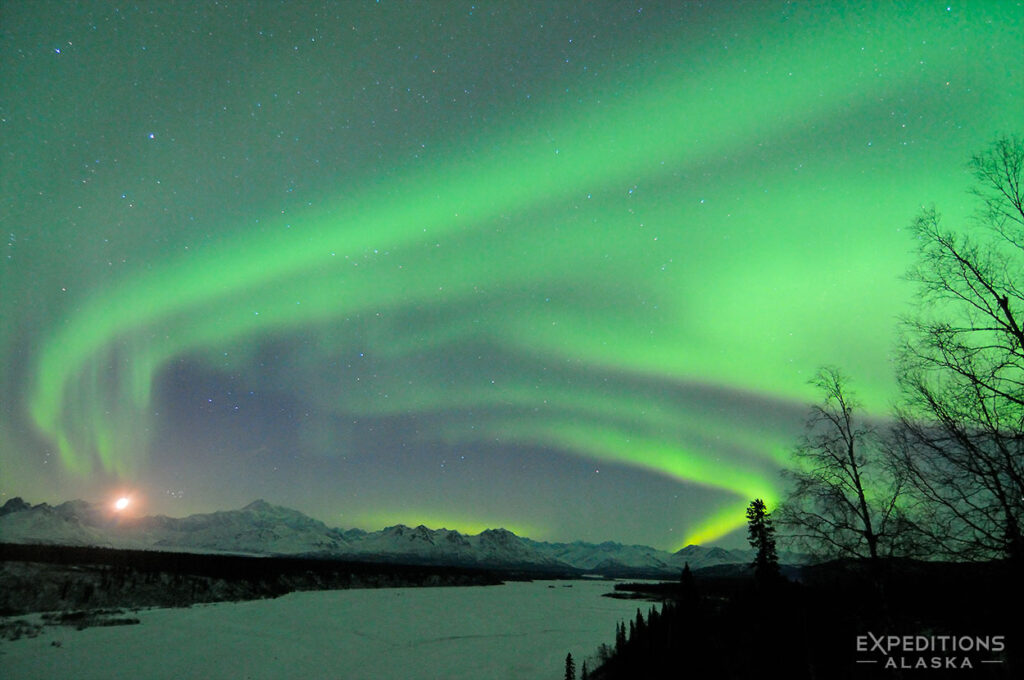
The aurora borealis is one of those experiences we can have that stay with us a long, long time. Not just in our minds and memories, but in our body, in our hearts, in our soul, in our very being; witnessing the aurora borealis stays with us in how we see the world around us. It’s a moving and powerful event, and I’m always grateful and humbled by the moment. It really is that incredible.
Photographing the aurora borealis, on the other hand, can be one of those frustrating and anxious experiences that similarly stay with us a long, long time; raises our blood pressure, causes depression, causes exhilaration, frostbite, tiredness, insomnia and too many other ailments to mention. It’s difficult, extremely challenging, and infuriating. It’s cold. It’s dark. The aurora borealis is often fleeting, ever changing, and virtually impossible to rigidly predict. It requires a clear, or nearly clear, sky. That means long hours of waiting, photographing, deleting, photographing, waiting, not photographing, shivering, mumbling, drinking coffee. It means fighting to stay awake, tearing your hair our wondering where is the best location to head toward, hours before even setting up a tripod. In short, photographing the northern lights is not easy.
This 3 part article on how to Photograph the Northern Lights is intended to help you plan for (and work around, best we can) some of the struggles and pitfalls that await. It’s still up to you, your camera and the gods of luck to actually bring home the images, but hopefully this article will help you with that. If you see any thing repeated in this article, figure that repetition probably suggests emphasis. Please feel free to add your own thoughts, questions, and so forth, in the comments section below.
When you’ve finished the article, you can download a free ebook (with more info and articles) and feel free to check out my northern lights photo gallery as well.
Snowshoeing on snow machine trail on Kennicott River, winter, McCarthy, Wrangell-St. Elias National Park and Preserve, Alaska. Click on the image above to view a larger version of this photo.
The cold in Alaska, in the winter, is incredible. Its stillness, its silence, its depth, and the intimacy of really feeling alone in the frozen north woods is an experience like no other. it’s It’s almost as if the cold is some thing, some being itself, a tangible reality rather than a temperature. It’s a unique experience, and it’s not at all entirely bad – in fact, I love it. But I don’t love freezing my tail off. My friend Patrick, longtime Alaska resident and a fantastic photographer says it best, “I like being in the cold, but I don’t like being cold”. It’s really an extraordinary experience, and I do look forward to the winter. But I don’t want to be cold; I want to be bundled up and cozy, and enjoy the cold from inside my insulation.
Photography in the cold is a tough gig; snowshoeing or skiing is rough when the mercury falls beneath minus 20, but doesn’t come close to trying to photograph in similar conditions, in my opinion. I haven’t found any activity that compares to photography; standing around, not moving much, trying to operate fiddly, frozen camera controls and tripods with fingers that refuse to move. I’ve crosscountry skied 10 miles and more at 45below, and I’ll take that any day over futzing with my camera at 30 below. When those mitts come off and my fingertips touch frozen metal, it burns like, well, like I don’t like it at all. So, if you’re headed to Alaska for some winter photography, such as for the Iditarod or to photograph the aurora borealis, hopefully this page might provide you some use.
Your winter clothing should align with the Three L’s: “Loft, Loose, and Lots” of it. That’s the key to warmth here. Big puffy down jackets, loose, not tight fit, and lots of clothes, head to toe = warm. Don’t skimp.
A good basic rule for cold weather clothing (and I mean, crazy, Alaska-winter cold, not 45 degrees F chilly) is a simple one; looser fits = better. Tighter fits, especially with footwear and handwear, are colder = NOT better. So keep that in mind when you order your boots, socks and gloves.
Comfort isn’t the bottom line here; at 40 below, comfort means warm. So buy your gear a little bigger than usual – a half size or so, if possible. Don’t go crazy, but don’t go with that sleek, skin-tight muscle shirt and form fitting, skin tight lycra pants you prance around in during the summer. Trust me. 🙂
The specific items list below is not meant to suggest these items are what you need, or even that these are what I think is best; it’s simply a look at what I have, or what I wish I had. Most of it works pretty well, and I’ve noted any items here that I think might not be the best choice. So, for now, my cold weather photography (i.e., not backcountry-travel) clothing goes a little something like this: