Gear Matters
I’ve been backpacking in Alaska for nearly 30 years. I’ve done solo trips lasting six weeks in some of the most remote wilderness on Earth, walked through most of the major mountain ranges in the state, and guided hundreds of people through places where the nearest road is a bush plane flight away.
In all that time, I’ve learned one thing about gear: it matters. A lot.
But not in the way most people think.
Backpacking isn’t about gear. It’s about being there. Standing on a ridge in the Wrangells watching the light shift across a glacier. Waking up to fresh snow in the Arrigetch. Crossing a braided river in Gates of the Arctic with nobody else for fifty miles in any direction. That’s what this is about.
Gear helps you do that comfortably. Or it doesn’t. The difference between a trip you’ll remember forever and a trip you’ll remember for all the wrong reasons often comes down to whether you brought the right stuff and knew how to use it.
The System Approach
Here’s something most gear lists won’t tell you: no single piece of gear works in isolation.
Asking “Is this fleece warm enough?” misses the point entirely. That fleece might be perfect if you’ve got the right base layers underneath and a shell to throw over it when the weather turns. Pair it with the wrong supporting cast and you’ll freeze.
Your gear is a system. Your sleeping bag works with your pad and your tent. Your rain gear works with your layers. Your boots work with your socks. When the system works, you’re comfortable. When it doesn’t, you’re wet and cold and wondering why you spent all that money.
This guide walks through the entire system. Not just what to bring, but how it all fits together and why it matters here in Alaska.
A Note on Asking About Gear
Before we dive in, a quick word on gear questions.
I get emails all the time asking things like “What boots should I buy?” or “What sleeping bag do you recommend?” Without context, those questions are nearly impossible to answer well. What kind of terrain? What time of year? What’s your experience level? What other gear do you already have?
The more specific you are about what you need your gear to do, the better advice anyone can give you. If you’re reading this guide and still have questions, that’s fine. Just give me something to work with. If you need more direction on how to do this, read this.
What to Expect in Alaska
Alaska isn’t like backpacking anywhere else. The conditions here will test your gear in ways that a weekend in the Rockies or a thru-hike on a maintained trail simply won’t.
Temperature swings
You can wake up to frost on your tent and be hiking in a t-shirt by noon. I’ve seen 75°F days in the mountains. I’ve also seen snow in July. A realistic range for summer backpacking here is 25°F to 75°F, sometimes within the same 24-hour period.
Wet
Alaska is wet. Even when it’s not raining, you’re crossing streams, pushing through dew-soaked tundra, and dealing with fog that rolls in without warning. Your feet will get wet. Plan for it.
Wind
Above treeline, which is where we spend most of our time, wind is a constant companion. It affects everything from your tent choice to your layering strategy to how quickly you can get hypothermic if you’re not paying attention.
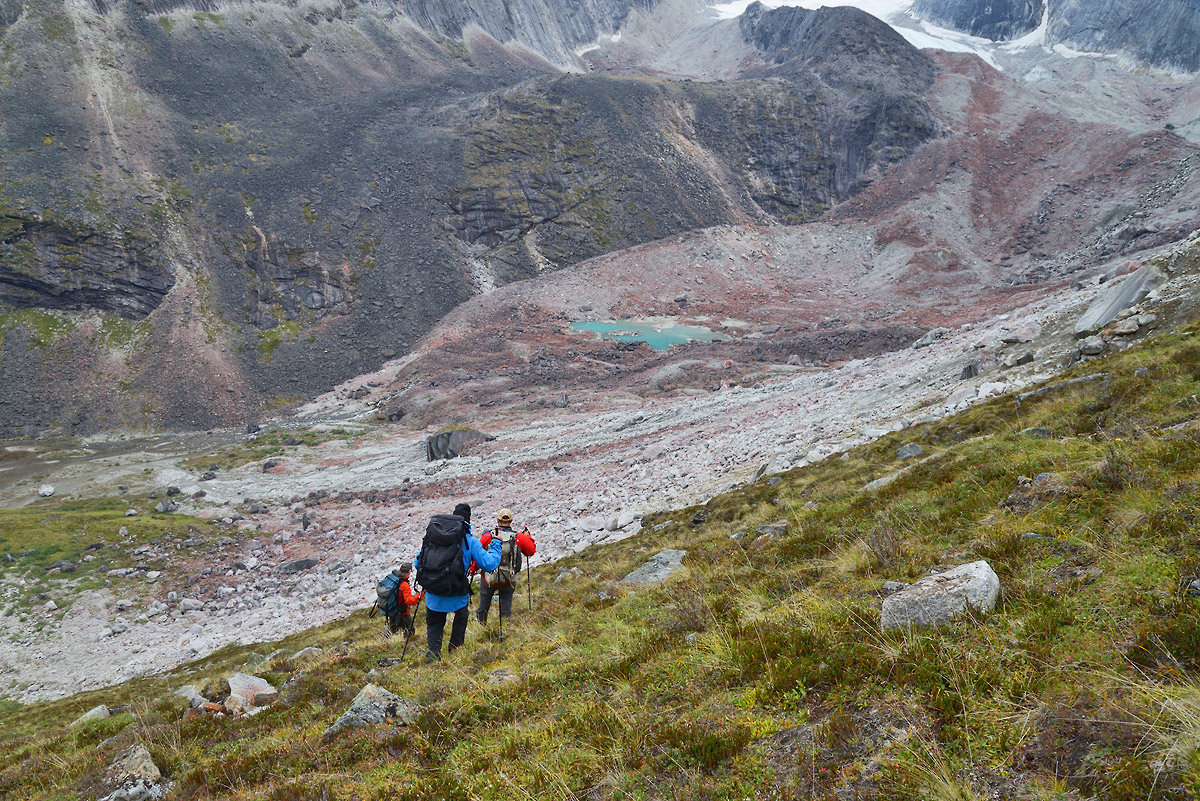
No trails
Most backpacking in Alaska is off-trail. That means uneven terrain, tussocks, scree, river crossings, and bushwhacking through alder that will tear at your gear and your patience. This isn’t a groomed path through the wilderness. It’s the wilderness.
Bugs
From late June through mid-August in many areas, mosquitoes can be absolutely heinous. They’re not everywhere, and timing and location matter enormously, but when they’re bad, they’re bad.
Remoteness
Once you fly in, there’s no gear shop. No REI. No “I’ll just grab one when we get to the trailhead.” If you forgot it or it breaks, you’re making do with what you have until the plane comes back.
Late Season Reality Check
If your trip falls after mid-August, you’re not backpacking in summer anymore. You’re backpacking in fall.
The high country doesn’t care what the calendar says. By late August, nights are getting cold. Genuinely cold. Snow is possible at any time, and it’s not unusual to wake up to a white landscape. The days are getting shorter too, which means you’ll actually need that headlamp you didn’t bother with in June.
Starting around August 20th, I’d suggest a 10°F bag for most people. Maybe colder. I’d also suggest an extra layer or two beyond what you’d bring for a July trip. We get at least a bit of snow and sub-freezing temperatures almost every fall. Pack accordingly.
The Big Three
In backpacking circles, “the Big Three” refers to your shelter, your sleep system, and your pack. These are typically your heaviest items and the ones that matter most when things go sideways. Get these right and you’ve got a foundation. Get them wrong and no amount of clever accessories might help you.
Shelter
Your tent is your last refuge against the weather. When it’s been raining sideways all day and you’re soaked to the bone and the temperature’s dropping, the one thing keeping your trip from becoming a survival situation is that thin shell of fabric and poles.
Don’t bring a car camping tent. Don’t bring a tent you’ve never set up before. Don’t bring a tent that can’t be guyed out properly.
Wind can be fierce in the Alaska mountains. A broad-sided family tent will get destroyed. A tent without adequate guy points will leave you lying awake at 2am listening to the poles flex and wondering if they’ll make it to morning. A tent you’ve never practiced setting up will have you fumbling with poles in the rain while everyone else is already warm and dry.
What to look for
A good backpacking tent for Alaska should be freestanding or at least easy to pitch on varied terrain. You might end up camping on a gravel bar, a steep hillside, or a glacier moraine. Stakes don’t always hold, and sometimes you can’t use them at all.
It needs solid guy points and guy lines. This isn’t optional. When the wind picks up, and it will, you need to be able to anchor that tent down properly. Most tents don’t come with enough stakes or guy line to do this right. We replace the stakes in nearly all our tents with MSR Groundhog stakes, and we add additional guy lines. You should do the same.
It needs to be waterproof. Actually waterproof. Seam-sealed, with a decent fly that doesn’t touch the inner tent when things get wet and saggy.
And it needs to be something you can set up quickly, in bad conditions, possibly wearing gloves. Practice at home.
Size matters, but not how you think
I don’t generally recommend three-person tents for Alaska backpacking. They’re often too big to find a flat spot for, and unless they’re true four-season mountaineering tents, they don’t handle wind well. Two-person tents hit the sweet spot for most people. Enough room to be comfortable, small enough to pitch almost anywhere, light enough to carry.
If you’re going solo, a quality one-person tent works fine, though most sacrifice some storm-worthiness for weight savings. Know the tradeoffs.
Four-season tents?
For most summer and early fall backpacking, a good three-season tent is what you want. Four-season mountaineering tents are burlier, but they’re also heavier, don’t breathe as well (more condensation inside), and are designed for snow loads more than rain.
Hilleberg tents are a nice exception to that rule. Four-season tents have their place, particularly for trips to exposed areas like the Arctic coast where winds can be brutal. In some of these locations that’s what we always bring. But they’re not the default choice for most backpacking trips here.
Ground cloth
Bring one. A simple piece of Tyvek or a lightweight footprint will protect your tent floor and add years to its life. The ground can be damp and that little extra layer of fabric can help keep the inside of your tent dry.
We have more on tents in our gear archives if you want to dig deeper, but the short version is this: bring a tent you trust, know how to set it up, and make sure it can handle weather.
Sleep System
Your sleeping bag and pad are the other half of your overnight equation. A good tent keeps the weather out. A good sleep system keeps you warm once you’re inside.
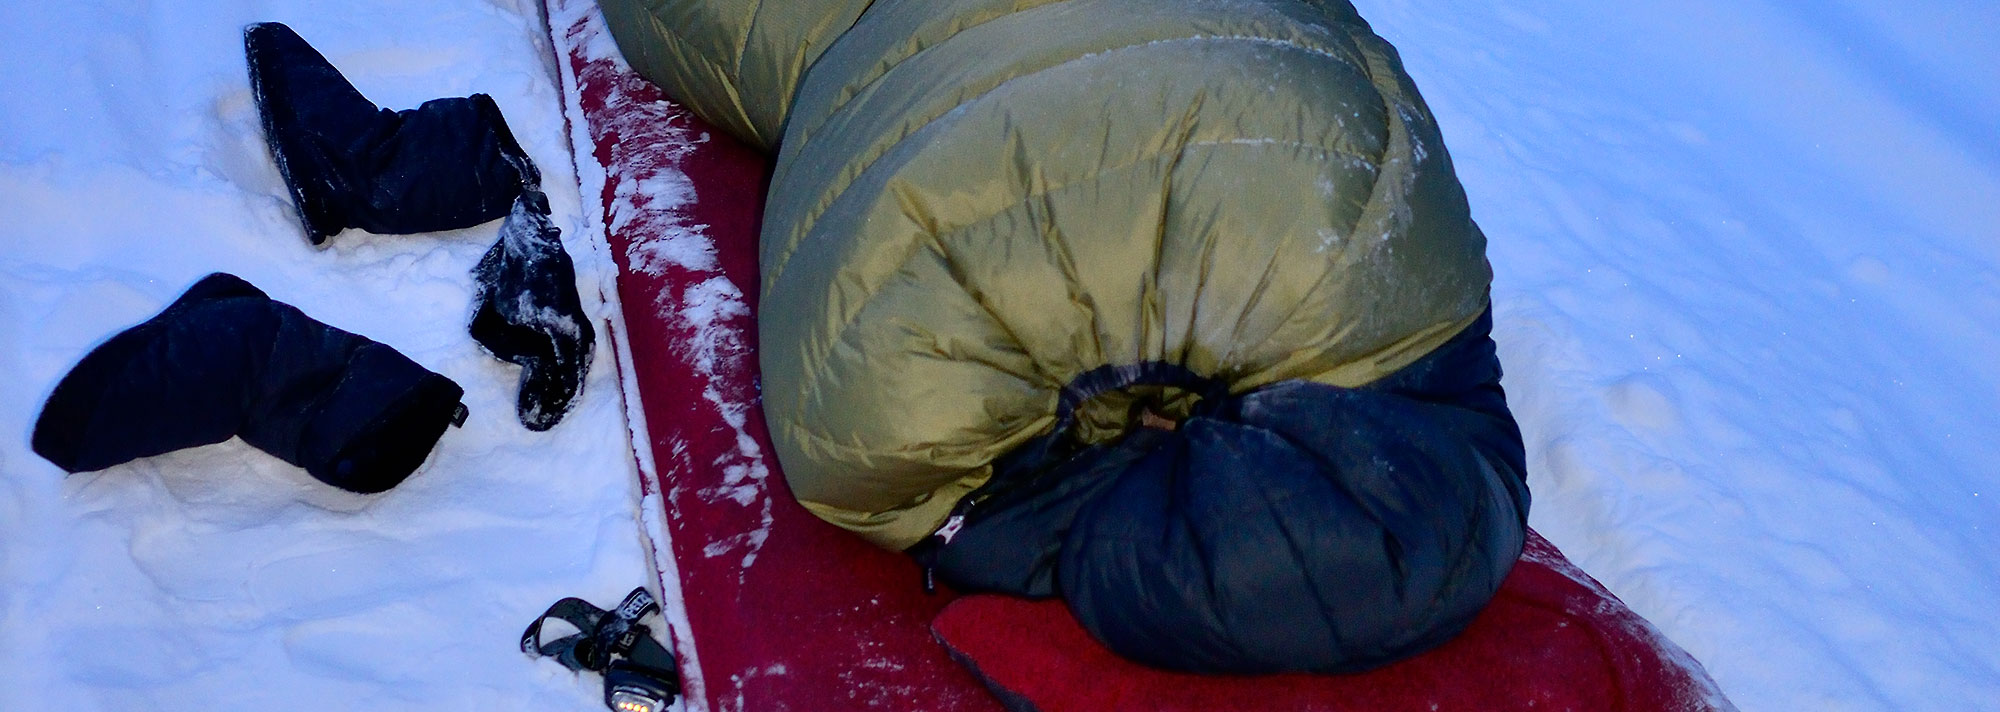
Sleeping Bags
I’ll say this plainly: a 32°F bag is not adequate for Alaska backpacking. You might get lucky and hit a warm spell. You might also spend a week shivering and not sleeping and hating everything about the trip. Been there, done that. Not again.
Consider a 20°F bag mandatory for summer trips. That’s not a suggestion. It’s the baseline.
If you run cold, or if your trip is later in the season, go warmer. A 10°F or even 0°F bag isn’t overkill for late August and September. I’ve seen people sleep comfortably in a minus 5°F bag in mid-August. Know your body and how you sleep.
Down vs Synthetic
This is one of the great debates in backpacking, and I’ve written about it at length elsewhere. The short version:
Down bags are lighter and more compressible for a given warmth rating. The weight-to-warmth ratio is unmatched. They’re also more expensive and, yes, they lose insulating ability when wet.
Synthetic bags are cheaper, heavier, bulkier, and retain more warmth when damp.
I use down. Have for years. The “down doesn’t work when wet” argument is overstated in my experience. I’ve gotten my sleeping bag wet exactly twice in decades of backcountry travel. Both times it was due to a specific mishap, not just normal conditions. If you’re keeping your gear dry, which you should be, down works beautifully.
That said, if budget is a concern and you don’t mind the extra weight and bulk, a good synthetic bag will serve you fine.
Features that matter
A hood that cinches down around your head. You lose enormous amounts of heat through your head, and a good hood makes a real difference on cold nights.
A full-length zipper, ideally two-way. Being able to vent from the bottom when your feet are hot, or open the bag up entirely on warmer nights, adds versatility.
A draft collar and draft tube along the zipper. These block cold air from sneaking in.
Mummy shape. It’s the most thermally efficient design. If you’re claustrophobic in mummy bags, get one with a roomier cut, but I recommend you avoid rectangular bags entirely.
What you don’t need
Stash pockets, pillow pockets, sleeping pad sleeves. Marketing features that add weight and complexity without meaningful benefit.
Sleeping Pads
Insulation underneath you matters more than most people realize. The ground will suck heat out of your body all night long. In Alaska, the permafrost (frozen ground) isn’t far beneath you. Your sleeping bag compresses under your weight, which means the insulation beneath you is doing almost nothing. That’s what your pad is for.
Don’t skimp here. A cheap foam pad might be light, but it won’t insulate well and you won’t sleep well. The R-value matters. For Alaska, I’d suggest an R-value of at least 3.5 for summer, higher for shoulder seasons. My favorite sleeping pads for backpacking are the Exped Downmat series. Winter and summer pads of theirs are great.
Inflatable pads are comfortable and pack small. Closed-cell foam pads are bombproof and don’t puncture, but they have a very low R-value, so choose them carefully. Many people use both, with a short foam pad as backup and additional insulation under a primary inflatable.
Whatever you bring, bring a repair kit for it if it’s inflatable. A slow leak at 11pm is not how you want to spend your night.
Backpacks
I get asked about pack size constantly. “What size backpack do I need?”
The honest answer sounds glib but it’s true: whatever fits you and your gear. Trip length will be a big factor. Our usual recommendation is 65 liters minimum, but our trips usually run five days or longer. You can probably use something smaller for shorter trips.
Fit first, everything else second.
A pack is like a pair of boots. What works for me might be terrible for you. The frame geometry, the hip belt shape, the torso length, the shoulder strap angle. All of it affects how the pack carries, and that’s deeply personal.
If you’re buying a new pack, spend time with a knowledgeable outfitter. Have them measure your torso and hips. Try multiple packs. Load them up with weight and walk around the store for at least ten minutes per pack, not two. A pack that feels fine empty might be agony under load.
Robustness matters
This is Alaska. You’re going to be scrambling over rocks and scree, crossing glacial moraines, pushing through alder thickets that grab at everything. Lightweight packs often just don’t hold up. The ultralight crowd may disagree, but I’ve seen too many packs fail in the field to prioritize shaving ounces over durability.
Hyperlite packs are an exception. A few of our guides swear by theirs, and they’ve held up well. I still use my vintage Mystery Ranch pack. It’s a tank, heavy by modern standards, but it hasn’t failed me in over 20 years.
Size
For most Alaska backpacking trips, you’re looking at somewhere between 60 and 80 liters. Maybe larger for extended trips or winter travel. Smaller for shorter trips. The exact number depends on what else you’re bringing and how compressible your gear is.
Here’s Trevor’s take on pack size, and after years of guiding in Alaska I think he’s right:
Trevor On Backpacks
“Bigger is almost never a problem. If you show up to a trip and can’t fit something, a bigger pack is the solution.
I use a 100L pack even for two or three day trips, and I never notice it’s too big. The advantage is I never worry about fitting things. People stress and fiddle with their systems endlessly when really they just need more room. I’ve wasted hours helping someone cram gear into a 55L pack because they thought 65L was too big. It doesn’t make a meaningful difference how big your bag is. It can only help.
65L minimum is our standard recommendation, but don’t be afraid to go larger.”
- Carl Counters: That said, everything has its opposite. Don’t buy a bigger pack just to have a bigger pack. And if you do get a bigger pack, don’t think you have to fill it. Pack prudently. Don’t overpack.
The goal is to fit everything inside the pack. I cannot stress this enough. The “clothesline look”, where you’ve got stuff strapped all over the outside of your pack, is a problem. You’ll lose gear. You’ll catch on brush and branches. Things will get wet that shouldn’t. It doesn’t carry well. And I’ll repeat myself. You WILL lose gear.
At most, the only things on the outside of your pack should be your water bottle, trekking poles, and maybe a pair of camp shoes. Everything else goes inside.
Features
A removable lid or “brain” is useful. I keep my essentials in there: first aid kit, sat phone, GPS, maps, lighter. On layover days it can double as a daypack.
A rain cover is mandatory unless you’re running a fully waterproof pack or a bombproof internal dry bag system. If you’re not experienced with managing waterproofing internally, just get a rain cover. They’re cheap, they work, and they’re one less thing to think about.
Good hip belt pockets are handy for snacks and small items you want accessible without stopping.
Hydration reservoirs
I don’t use them for most trips. In Alaska we’re often drinking directly from streams and creeks without filtering. A Nalgene bottle in a side pocket is simpler. Fill it when you pass clean water, drink as needed. No digging out bladders, no hoses freezing, no dealing with the inevitable leak.
If you prefer a reservoir and you know how to manage it, that’s fine. Just know it’s not required.
If you’re filtering water, that means you have to stop and make a project of it every time you fill up; by all means, a hydration bladder system works great. But if you’re not filtering water, a good bottle is the ticket.
- Guides’ Caveat: We DO bring a large dromedary-style bladder for camp. Depending on group size, a 6L or 10L MSR Drom is gold for camp & kitchen time.
Clothing Systems
Here’s how I think about backcountry clothing: two wardrobes.
One set for hiking. One set for camp and rest.
When you’re moving with a pack on your back, you generate heat. A lot of it. You don’t need much insulation while hiking unless conditions are genuinely nasty. What you need is protection from rain, wind, and sun, plus the ability to shed or add layers quickly as conditions change.
When you stop, everything shifts. You cool down fast. That’s when you want warmth. Camp clothes are about comfort and heat retention while you’re cooking dinner, sitting around, and sleeping.
Keeping these two systems separate, and keeping your camp clothes dry, is the key to staying comfortable on a multi-day trip.
Hiking Clothes
Base layer
Something lightweight, wicking, and non-cotton. Synthetic or merino wool. This is what touches your skin and moves moisture away from your body.
Hiking shirt
I prefer a long-sleeved nylon shirt with a tight weave. Safari-style, nothing fancy. The tight weave fabric matters because bugs can’t bite through it.
Your typical thin wool or synthetic base layer? Mosquitoes will eat right through it. A proper nylon hiking shirt gives you sun protection, bug protection, and dries quickly when you sweat or get rained on.
If bugs aren’t a concern and the weather’s warm, a simple wicking t-shirt works fine.
Hiking pants
Lightweight, quick-drying, synthetic. Softshell hiking pants are ideal. Something with a bit of stretch for scrambling and a tight enough weave to resist abrasion from brush. I wear long pants most of the time. Shorts are nice when you hit that rare hot day, but probably 70-80% of my summer hiking is in long pants. Zip-off convertibles work if you like them.
Underwear
Athletic or running-style briefs or shorts in synthetic fabric. Lycra, polyester, whatever wicks and dries fast. Cotton is miserable.
Camp Clothes
This is where you stay warm.
Warm socks
Heavy wool socks for camp. Not your hiking socks. Dedicated warm socks that stay dry in your pack all day and go on your feet when you’re done hiking. Your feet have been working hard. They deserve this.
- Guide’s tip: If it’s wet out, add a gallon-sized ziplock over each of these warm socks when you’re moving about camp, going back & forth to the kitchen, etc. Keep ’em dry. Obvioulsy not if you go for a long walk, but just puttering around camp? For sure.
Base layers
Lightweight or midweight wool or synthetic long underwear, top and bottom. If it’s colder, a second or heavier layer. I like having options I can mix and match depending on conditions.
Insulating layer
A lightweight down jacket is hard to beat for warmth-to-weight ratio. Synthetic puffy jackets work too and don’t care as much about moisture. This is your “as soon as I stop moving” layer.
Your Rain Gear
Yes, rain gear counts as insulation. Not because it’s warm, but because it blocks wind and traps heat. On a cold evening, throwing your rain shell over your puffy makes a real difference.
Hat
A warm wool or fleece beanie. You’ll wear it more than you expect.
Gloves
Fleece or wool gloves. I rarely wear gloves while hiking, but they’re worth having for camp, especially on trips with glacier travel or in the shoulder season.
Rain Gear
If I had to pick one piece of gear that matters most in Alaska, this might be it.
You will get rained on. Maybe for hours. Maybe for days. The question is whether you stay functional or become hypothermic.
Jacket
Waterproof, breathable, hooded. Gore-Tex, eVent, or similar membrane technology. It needs to actually keep water out, not just resist a light drizzle. It needs pit zips or good ventilation because you’ll be working hard in it and the “breathable” part only goes so far.
I’ve owned more rain jackets than I care to count. I’ve written about the frustrations of waterproof-breathable technology elsewhere. The short version: the DWR coating that makes water bead up will eventually fail. All of them fail. How fast depends on how hard you use them. Backpacking through Alaskan brush eats DWR coatings for breakfast.
Treat your jacket before your trip. Wash it according to the manufacturer’s instructions, reapply DWR treatment, and hope for the best. Or budget for a new jacket every couple of seasons like I do.
Pants
Waterproof rain pants are non-negotiable. Same membrane technology as your jacket. Full-length side zips are nice for ventilation and for putting them on over boots, but they add weight and potential leak points. Your call.
Ponchos?
No. Absolutely not. Off-trail hiking means pushing through brush, and a poncho will get tangled constantly, and more often, shredded. It’s also useless in wind, which we can have plenty of. Leave the poncho at home.
- Guide’s Caveat: If you really know what you’re doing, and you really have your systems down, just as with everything else here, this may not apply to you. Your poncho may be just fine. But in our experience, for people who don’t have a ton of experience with backpacking gear, leave it home.
Layering Philosophy
The point of a layering system is flexibility. Conditions change fast here. You might start the day in a t-shirt and end it in every layer you own.
Your layers should work together. Base layer wicks moisture. Mid layers insulate. Shell layer blocks wind and rain. Each piece does its job so the system works as a whole.
Cotton generally has no place in this system. Cotton absorbs water, holds it against your skin, and steals your body heat. it doesn’t have great insulating value when it’s wet, and it takes a while to dry. “Cotton kills” is a cliché because it holds some sense (kinda-sorta). If you know what you’re doing with your gear, and know when to use what, by all means; enjoy a cotton t-shirt. I wear one in camp sometimes. But for hiking? Leave the jeans and cotton hoodies at home.
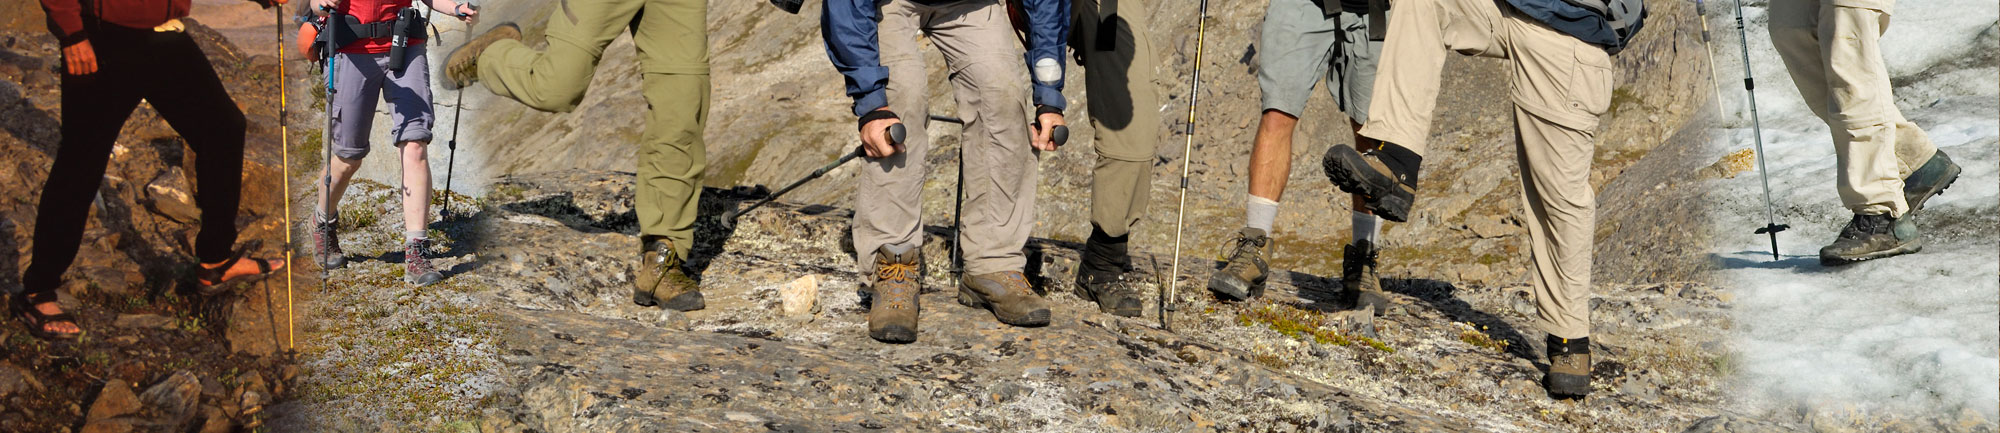
Footwear
As the Legend Bob Marley sang “My feet is my only carriage”.
For backpackers, this is more than true.
Your feet carry you. Everything else is secondary.
Boots vs Trail Runners
This is one of the more heated debates in backpacking, and I’ll give you my take: most people should wear boots.
Trail runners are lighter. They dry faster. Plenty of experienced hikers use them successfully, even here. I’ve worn them plenty of times. A number of my friends who guide wear them.
But they’re less supportive on uneven terrain, (typically) have less traction, offer less protection from rocks and roots, and generally aren’t waterproof. For off-trail hiking with a heavy pack over rough ground, boots provide stability that most people need.
If you’re an experienced hiker with good ankle strength, solid balance, and a dialed-in ultralight kit, trail runners might work for you. If you’re not sure, or if this is your first time hiking off-trail in Alaska, bring boots.
What to look for in boots
Waterproof. I use Gore-Tex lined synthetic boots and I always recommend waterproof boots. Your feet will get wet from crossings regardless, but waterproof boots keep out the dew, the damp bog, the rain, the wet brush, and all the other moisture you encounter between stream crossings.
Some people disagree. They prefer non-waterproof mesh boots that let water in and drain out quickly. That works in some environments. In Alaska, where you’re often hiking through wet tundra and dewy vegetation instead of on gravel or dirt trails, I think waterproof is the better choice. But I won’t die on this hill if you’ve got a system that works for you.
Fit matters more than brand. I can tell you what boots I wear, but my feet aren’t your feet. Spend time with a good boot fitter. Try multiple options. Walk around the store with weight on your back. Then wear them at home, on day hikes, on everything you can before you show up for a week-long trip.
Blisters happen when boots don’t fit right or aren’t broken in. Break in your boots before your trip, not during it.
Tread. Good, grippy tread that handles wet rock and loose scree. When it wears down, replace the boots or resole them.
Camp Shoes and River Crossings
You’ll want something for around camp that isn’t your hiking boots. After a long day, getting your feet out of those boots is a small luxury. You’ll also need something for river crossings, and those two needs can overlap.
I used to swear by Crocs. Light, quick-drying, comfortable around camp. The problem is they come off your feet easily in fast water. If you use Crocs or similar, add some webbing or cord to strap them on securely for crossings. P-cord is fine. Just have SOMETHING to fasten them on your feet with.
Sandals like Chacos or Tevas work for crossings and dry reasonably well. They’re heavier and take longer to dry than Crocs, but they stay on your feet.
Lately I’ve been using Vivo Barefoot Ultra shoes. Ultralight, fast-drying, and they tie on securely. Worth a look.
Do NOT bring flip-flops. They will come off in a crossing, they offer no protection, and you’ll regret it. Closed-toe shoes only for river crossings.
Some people skip the camp shoe entirely and just use their boots for everything, including crossings. That works if you’re comfortable with wet boots all day. A few gallon-sized ziplock bags in your pack can serve as vapor barrier liners so you can put dry socks inside wet boots around camp. It’s a workable system if you want to save the weight.
Socks
Good socks matter. Bad socks cause blisters.
I wear a silk liner sock under a midweight wool or wool-blend hiking sock. The liner reduces friction and wicks moisture. The outer sock provides cushioning and warmth.
Bring at least two pairs of hiking socks and liners, plus one pair of heavy wool camp socks that never go in your boots. Rotate your hiking socks to let them dry. Take care of your feet and they’ll take care of you.
Gaiters
Not essential for everyone, but useful. Gaiters keep scree, snow, and debris out of your boots. They help keep your lower legs dry when you’re pushing through wet brush. In shoulder season when there’s snow on the ground, they’re close to mandatory.
Lightweight trail gaiters are enough for most summer trips. If you’re heading out late season when snow is likely, consider something more substantial.
Field Gear
Beyond the big items, there’s a whole collection of smaller gear that makes the trip work. Some of it we provide on guided trips. Some of it you’ll need to bring yourself. Some of it we can do either/or; your choice.
Kitchen
On our trips, if you select a fully-outfitted option, we provide the group kitchen: stove, fuel, cookware, mess kits, water filter system (if needed), and a cook tent. You don’t need to bring any of that.
If you’re doing your own food, you’ll need to talk to us about what you need and what you’re bringing. We’ll discuss that during the trip planning process. You do NOT need to establish that at the outset. So long as we have it together and a plan in place a few weeks before departure, we’re good.
If you’re planning your own personal trip, or just want to understand why we set things up the way we do, the kitchen shelter deserves serious attention.
Cook Tent
I know most folks don’t use these when backpacking in the Lower 48 states. We consider them a “must have” for all backpacking and basecamp or basepack trips in Alaska. The cook tent is on our “do not leave home without” list. I (Carl) probably haven’t done a summer/fall backcountry trip without a cook tent here in 30 years.
Not one.
Why?
Don’t be cooking or eating or storing food in your sleeping tent. Not on our trips, anyway. In grizzly bear country, and even black bear country, cooking and eating in your tent (that includes in your vestibule) is asking for trouble. You don’t want food smells where you sleep. End of story.
So you need some form of shelter for your kitchen.
A cook tent, tarp, or mid-style shelter gives you a place to prepare food, eat meals, and wait out weather without retreating to your sleeping tent. When it’s raining or the wind is howling, which can happen here in Alaska, having a sheltered spot to cook & eat dinner makes the difference between a fun evening together and a miserable one.
I carry a teepee-style shelter for group trips. Lightweight pyramid mids work well. Black Diamond’s mid is a popular choice, but a bit small for group trips (they also need to be seam-sealed).
Our choice (trip dependent) is either one of the various sizes for Seek Outside teepees or the newer Big Agnes Gold Camp 5.
These shelters are not bug-proof, but that’s rarely the priority for a cook shelter. They go up fast, shed wind nicely, and give you enough room to sit comfortably while you eat.
For solo hikers or couples, a simple silnylon tarp works. An 8×10 tarp can keep four people dry if you know how to pitch it. Bring adequate stakes, plenty of cord, and use your trekking poles to set it up. Tarps are flexible. You can configure them for different conditions once you know what you’re doing.
One thing to keep in mind: you’re often above treeline in Alaska, which means no trees to rig a tarp from. A cook tent or mid with its own pole is ideal because you’re not relying on environmental fixtures that may not exist. If you go with a tarp, make sure you can pitch it using trekking poles alone.
But there’s a tradeoff: if you want to go for a day hike after setting up camp, or explore on a layover day, someone’s without their hiking poles if they’re holding up your kitchen. Every gear choice is a choice of compromise.
If you have more than 2-3 people, a teepee will be infinitely better. They’re a heavier, sure. But backpacking gear is all about give and take; the compromise on weight is well worth it imo.
A teepee is generally going to be a little easier to put up in foul weather. Tarps can be fiddly. They work, kinda, but they’re not nearly as weather proof or comfortable as a proper shelter.
Key features
Lightweight. Sturdy enough to handle wind, with proper guy points. Waterproof. Easy and fast to set up. It doesn’t need to be bug-proof. If bugs are severe, you can retreat to your sleeping tent after dinner. The cook shelter is for cooking and eating, not sleeping.
Do NOT skip a cook tent.
Eating Setup
Cookware and Mess Kits
Your mess kit and cookware setup depends entirely on what meals you’re planning.
If you’re doing elaborate cooking, you’re going to need more intense gear. If you’re running a simple freeze-dried, rehydrated, eat-out-of-the-bag setup, you can get away with a lot less.
For our trips, here’s what we typically bring.
- Fry-bake skillet with lid
- MSR Dragonfly and/or WhisperLite stove, depending on trip length & # of people
- 32-ounce bottle of white gas (volume is variable)
- Spare pump for the stove and cleaning/repair kit
- One-quart or three-quart cooking pot, depending on group size and trip length
- Sometimes a cutting board, and
- sharp knife
For personal mess kits, each person carries.
- Fair Share bowl with screw-on lid
- Insulated mug with lid
- Lexan or plastic knife, spoon, and fork
- Lightweight mesh ditty bag to keep it all together
On any given trip, this setup may change completely depending on what food we’re preparing, how many people we have, and how long the trip is. No other part of your gear setup is more variable and contextual than the kitchen. What works for a five-day trip with two people eating freeze-dried meals is totally different from what works for an eight-day trip with five people doing real cooking.
Stoves and Fuel
If you’re doing a trip where you handle your own cooking, you’ll need a stove and fuel. Canister stoves are simple and work fine for most conditions. White gas stoves handle cold better and the fuel is easier to source in remote areas. We can discuss specifics based on your trip.
Whatever stove you bring, always carry a backup ignition source. Matches or a lighter, ideally both. Piezo igniters fail. Don’t rely solely on the built-in spark.
And bring more fuel than you think you need. Running out of fuel three days from pickup is not a situation you want to be in.
Bear Country Essentials
All of Alaska is bear country. We take this seriously, and so should you.
Bear-resistant food containers
On our guided trips, we provide approved BRFCs for the group. You’ll be carrying one, and everything with an odor goes inside. Food, sunscreen, lip balm, toothpaste, snacks. All of it.
If you’re doing your own trip, you need an approved container. The Bear Vault BV500 has been my go-to for years. It’s robust, holds a reasonable amount, and doubles as a camp seat when you need to get your butt off the cold ground. For longer trips when a single canister won’t cut it, Ursacks make good overflow bags. Just learn to tie them correctly.
Some outfits don’t use bear-resistant containers. I think that’s misguided. Yes, the odds are in your favor on any single trip. But habituated bears become dangerous bears, and I don’t want to deal with animals that have learned to associate backpackers with food. We’re guests in their home. Keep your food locked away.
Bear spray
Carry it. Accessible, not buried in your pack. I use Counter Assault. One canister per two or three people works for a group; solo or as a pair, carry one each.
You can’t fly with bear spray and you can’t drive it through Canada. Plan to buy it in Alaska. Yes, you’ll spend $50 for a can you’ll hopefully never use. That’s better than not having it when you need it.
So be CAREFUL. If you’ve never carried or used it before, get yourself a training can and do some practice before you go into the field with the real thing.
Hydration
Here’s where we diverge from a lot of standard advice: we don’t filter or treat water on most of our trips.
Well, let me clarify: some individual guides prefer to treat water. 2 of them. Most don’t. I (Carl) haven’t treated water on any but a few of my trips over nearly 30 years of backcountry travel with thousands of days backcountry time. it just isn’t an issue. If that changes, we’ll treat our water.
Alaska has remarkably clean water in the backcountry. Clear, cold streams coming off glaciers and snowfields. In decades of guiding, drinking straight from streams and creeks, we’ve never had anyone get sick from the water.
That said, there are exceptions. Certain areas, certain drainages, we filter. Beaver ponds, lowland water sources, anywhere that looks sketchy. The Alatna River, for example, carries Giardia. If your trip goes through an area where we filter, we’ll tell you.
If you’re not comfortable drinking unfiltered water, bring a filter or treatment tablets. That’s entirely reasonable. But don’t assume you need an elaborate hydration system. A Nalgene bottle in your pack pocket, refilled at clean streams throughout the day, works perfectly.
Navigation and Communication
Maps
We can provide maps for our trips. Topographic maps of the area we’re traveling through. Paper maps. They don’t run out of batteries.
If you want to bring a GPS, that’s fine. Use it to supplement the map, not replace it. Batteries die. Electronics fail. A paper map and a basic understanding of how to read it is your backup.
These days I (and most wilderness guides here) use my phone and either GaiaGPS or Caltopo app for navigation.
Compass
Useful to have along, especially if you want to practice navigation skills. Not essential if you’re with a guide, but a good skill to develop.
Communication
We carry a satellite phone and at least one backup messaging device like an inReach on every trip. Emergency communication in the Alaska backcountry is non-negotiable. On a guided trip, that’s covered. If you’re heading out on your own, invest in reliable sat communication. Cell phones don’t work out here; for now, that’s obviously changing with technology. But for now, don’t count on it. I’ve seen Starlink fail in some places too. Iridium satellite networks are the best here.
Safety & Contingency
Prevention. Prevention. Prevention.
The best safety strategy is prevention. Good decisions, careful movement, attention to conditions. But things happen anyway, and you need to be prepared.
First Aid
My approach to first aid in the backcountry involves three separate kits.
BLS kit
Basic Life Support. This is the serious stuff I hope to never need. Face mask, blood stoppers, trauma dressings, SAM splint, the gear for major emergencies. It stays packed, zipped, and untouched unless something goes badly wrong.
Repair Kits
Alaska eats gear. That’s a direct quote from a client after a particularly rough traverse, and it’s accurate.
The terrain here puts stress on equipment. Rocks, ice, brush, river crossings. Things break. Zippers fail. Poles bend. Pads develop leaks at the worst possible moment.
Bring a repair kit. Duct tape, tenacious tape or gear patches, a needle and heavy thread, spare cord, a multi-tool. Seam grip if you want to get fancy. The ability to field-repair a critical item can save a trip.
Know your gear’s stress points. Tent poles, zippers, pack straps, sleeping pad valves. Think through what might fail and what you’d do about it.
Know Your Gear
This matters more than most people realize.
Don’t show up with a tent you’ve never set up. Don’t bring a stove you’ve never lit. Don’t break in new boots on the first day of a week-long trip.
Test everything at home. Practice setting up your tent in bad weather if you can simulate it. Cook a few meals on your stove. Wear your boots on long day hikes with a loaded pack.
Know where everything is in your pack. When the weather turns nasty and you need to find your rain gear fast, or set up your tent in driving wind, that’s not the time to be figuring out your system.
The Don'ts
Some things just don’t belong on an Alaska backpacking trip. This isn’t about being purist or minimalist. It’s about not carrying stuff that will fail you, hurt you, or make the trip harder than it needs to be.
Ponchos
Useless in wind, shreds in brush, doesn’t cover your lower body. No.
Flip-flops
They will come off in a river crossing, and they offer no protection around camp. Closed-toe shoes only.
Cotton clothing
Cotton absorbs moisture, holds it against your skin, has little to no insulating properties when wet, dries slowly, and accelerates heat loss. No jeans, no cotton t-shirts as your primary layer, no cotton anything in your hiking kit.
32°F or warmer sleeping bags
You’ll be cold and you won’t sleep. Bring a 20°F or warmer bag, minimum.
Car camping tents
Too heavy, too bulky, not enough guy points, won’t handle wind. Bring a real backpacking tent.
Gear you haven’t tested
If you haven’t set it up, turned it on, or worn it for more than ten minutes, you don’t really know it. Test everything before your trip.
The clothesline look
Everything hanging off the outside of your pack is gear waiting to be lost, snagged, or soaked. Pack it inside.
What We Bring & What You Bring
On guided trips with Expeditions Alaska, we can handle the group gear so you can focus on your personal kit.
We provide
- Bear-resistant food containers
- Cook tent or tarp
- Stoves and fuel (or byo)
- Cookware and group kitchen supplies (or byo)
- Water filtration (where needed)
- First aid kits
- Satellite phone and emergency communication devices
- Maps and navigation
- Bear spray (available for the group)
- Trekking poles (if you need them)
- Tents (trip-specific; ask if you’re unsure)
- Food (if you’ve arranged that option)
Because we’re not a run-of-the-mill production line operation here, this can be tailor made to fit what you need. Feel free to ask if there’s something you need.
- Your personal clothing and rain gear
- Sleeping bag and pad
- Backpack
- Boots and camp shoes
- Personal eating utensils (bowl, mug, spoon)
- Personal toiletries and first aid items
- Any personal items you want along
If you’re unsure whether something is provided or whether you need to bring it, ask. We’d rather answer the question twice than have you show up without something essential.
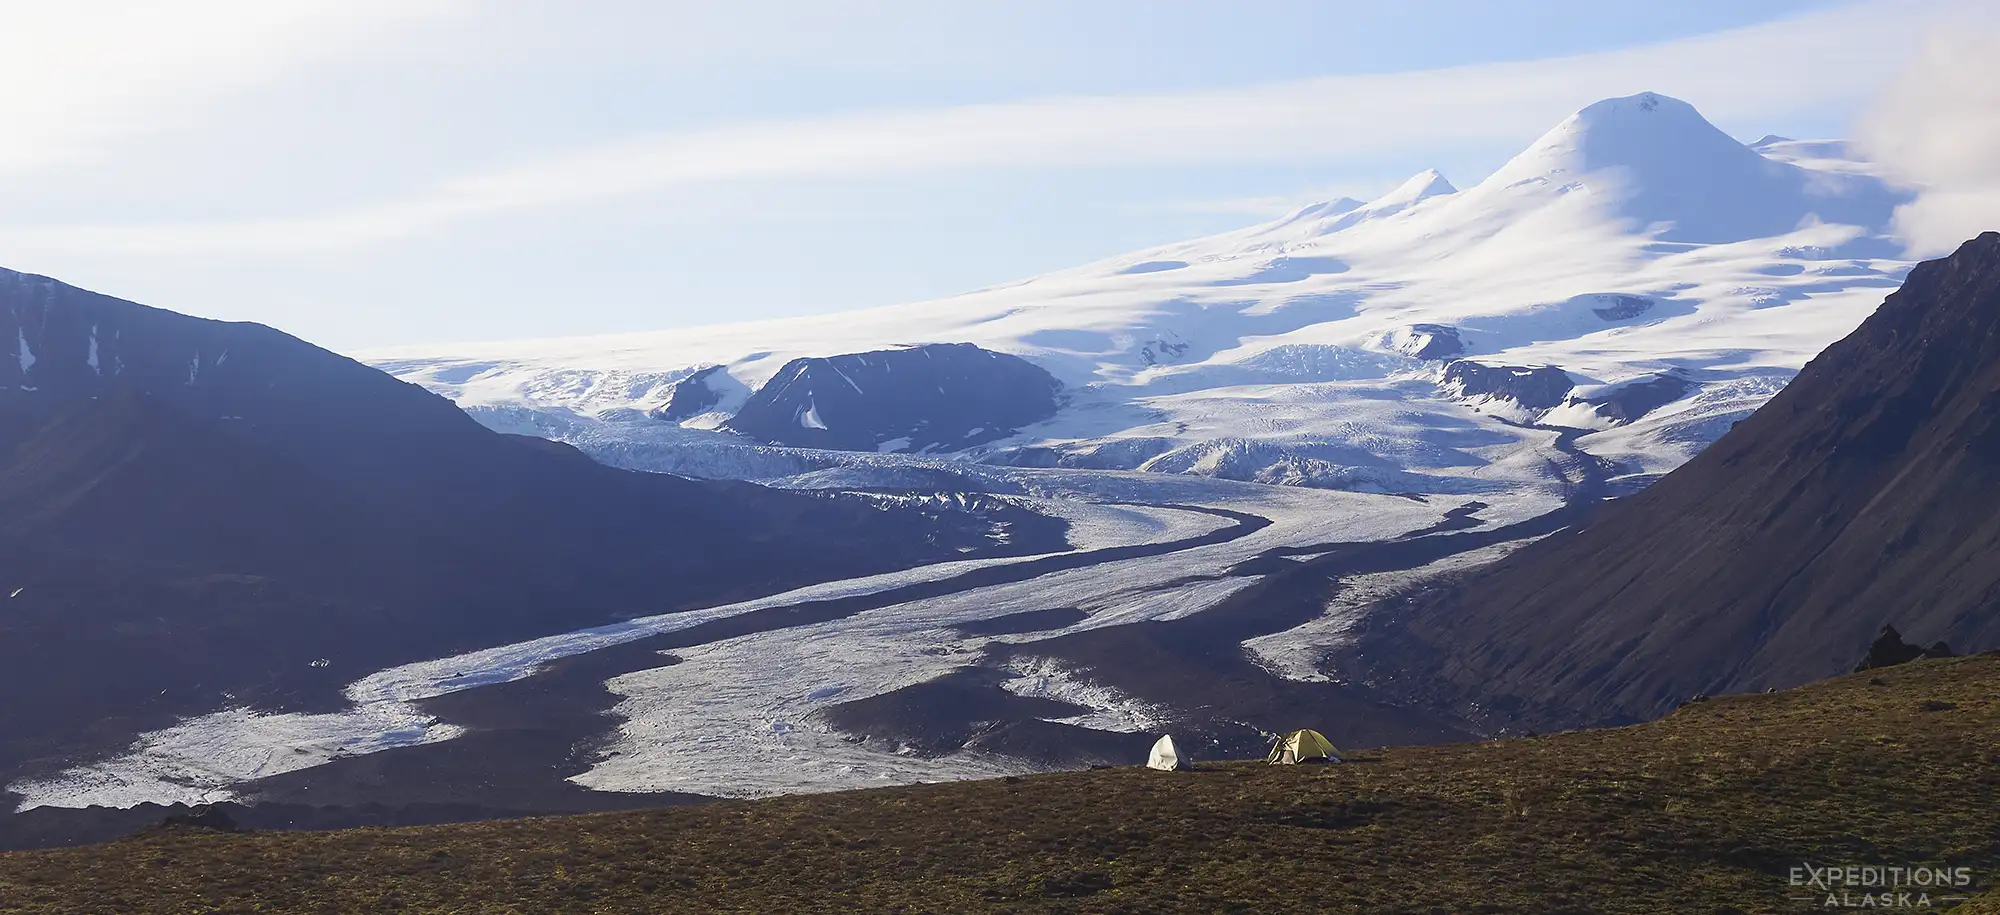
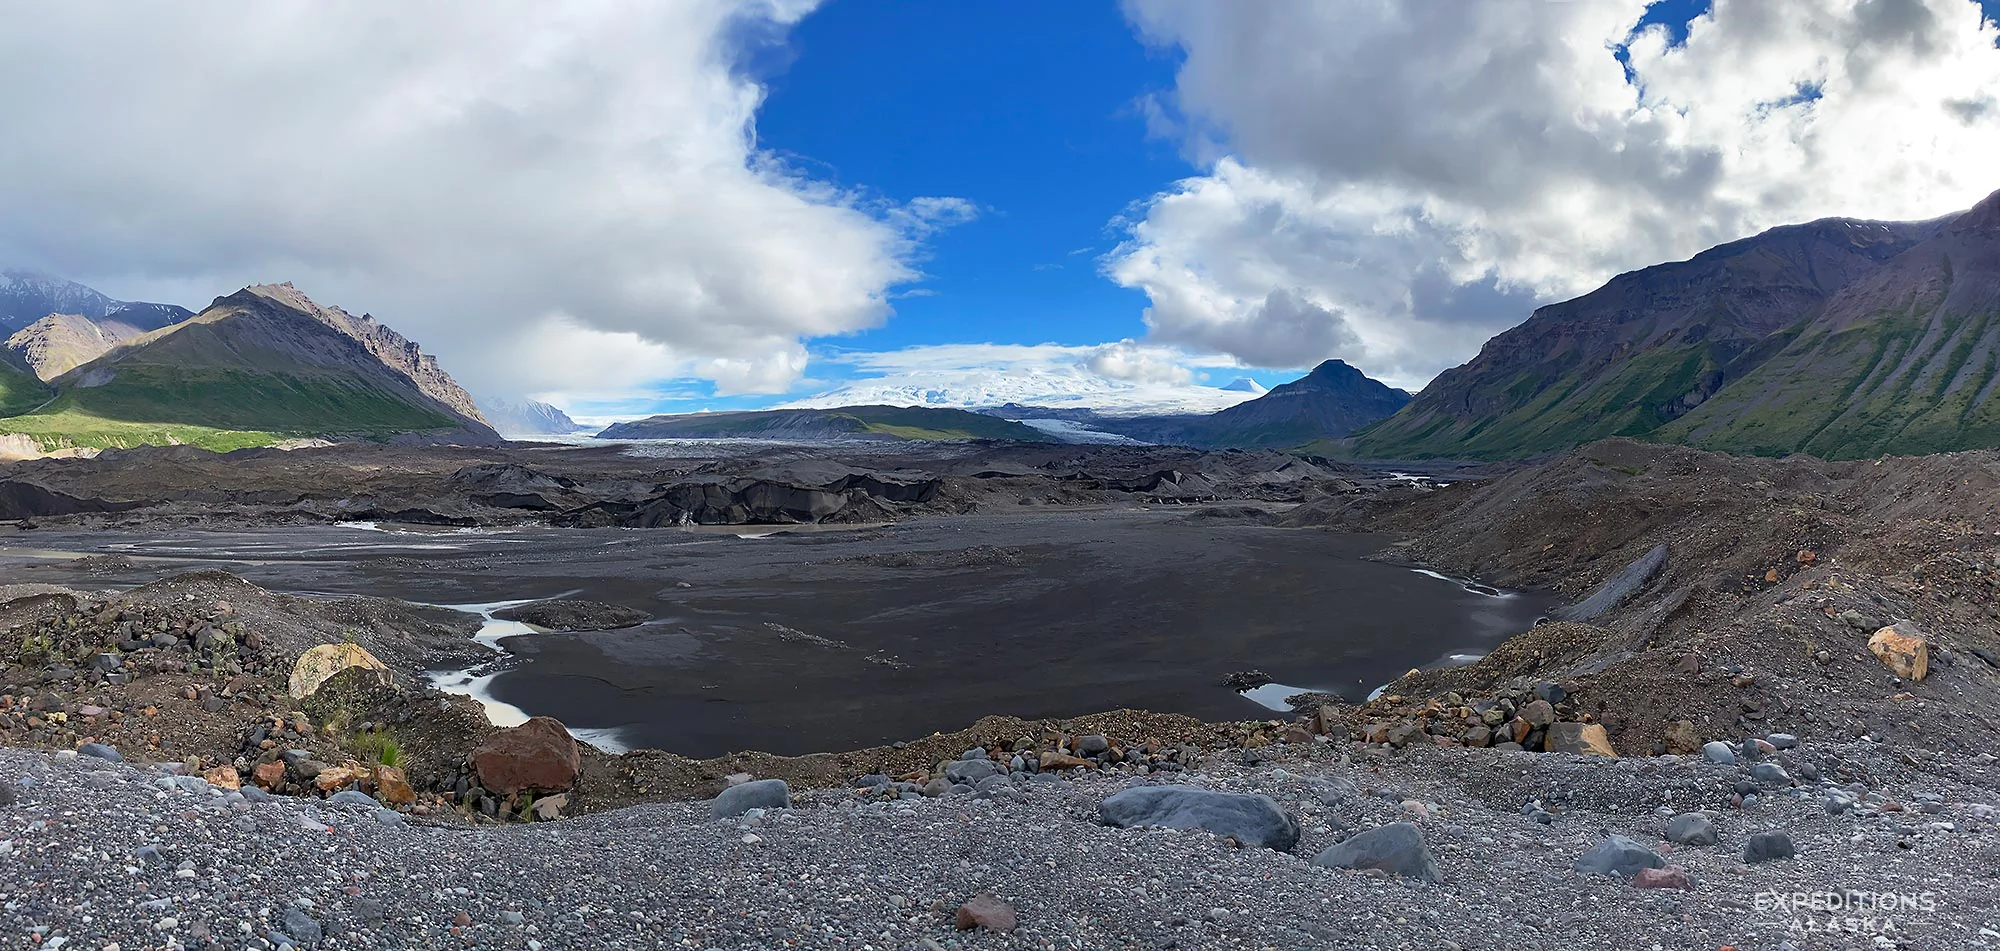
Camping beneath Giants
What a spot for a tent. The awesome auspices of Mt Wrangell and Mt Zanetti towering over us from the Sanford Plateau backpacking trip.
Alaska Outdoors Rental Gear
Not everyone wants to buy gear for a single trip, and that’s perfectly reasonable. If you’re flying in from out of state, renting can make more sense than hauling everything through airports or buying equipment you’ll use once.
Here are some reliable options for Alaska outdoor gear rental.
Alaska Outdoor Rental Gear They have locations in Fairbanks and Anchorage. They’re who I turn to if I need something in a pinch.
REI Anchorage. (and Fairbanks) Rents backpacks, tents, sleeping bags, and pads. Convenient if you’re already a member. Limited selection during peak season, so reserve early.
Alaska Mountaineering & Hiking (AMH). Local shop (Anchorage) with solid rental inventory. They know Alaska conditions and can help you pick appropriate gear. Good selection of bear canisters. Good people.
Other options
University of Alaska Outdoor Programs: Both UAA (Anchorage) and UAF (Fairbanks) sometimes rent gear to the public, often at lower rates than commercial outfitters. Worth checking if you’re flexible on timing.
What to Rent vs. Buy
Renting makes sense for: bear canisters (bulky to travel with), large backpacks, tents, trekking poles, and sleeping pads.
Buying usually makes sense for: sleeping bags (fit and warmth are personal), boots (fit is critical), rain gear (you’ll use it again), and clothing layers.
A Note on Timing
Peak season is July and August. Rental inventory gets thin. If you’re planning a trip during those months, reserve gear well in advance, ideally a month or more. Don’t show up expecting to grab a bear canister the day before your trip.
If you’re doing a guided trip with us, we provide the group gear. But if you’re heading out on your own and don’t want to invest in a full kit, rental is a solid option.
On The Blog
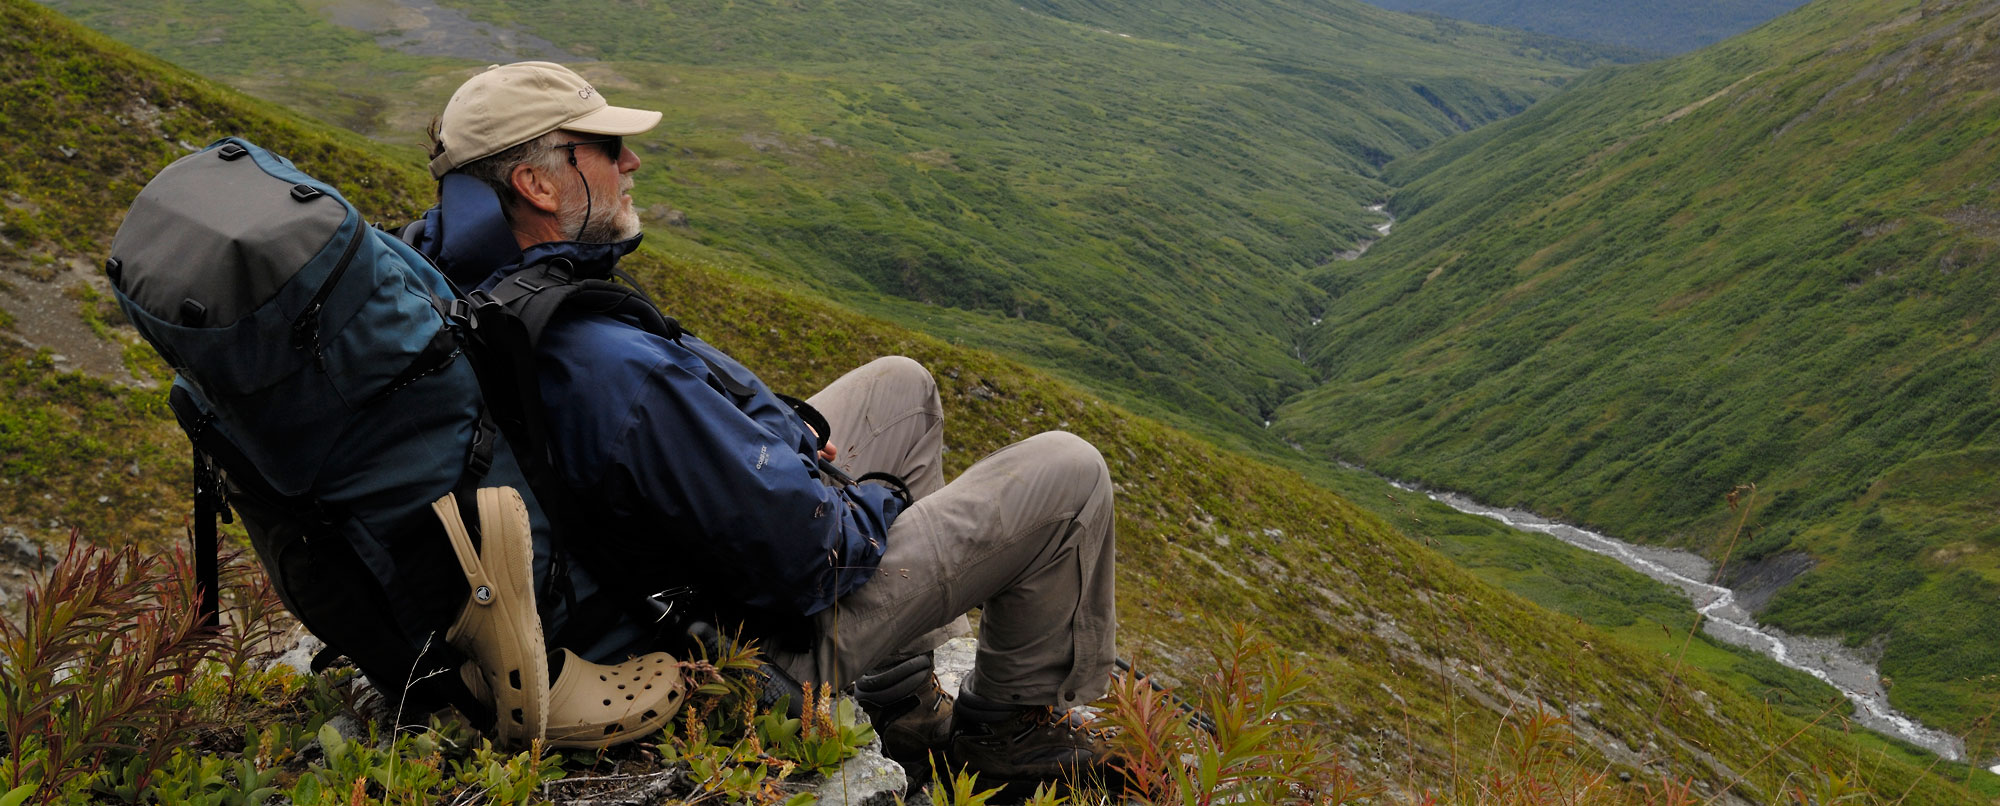
Alaska backpacking demands trekking poles. After years guiding trips across boulder fields, glacier moraines, and steep brushy terrain, I’ve learned that poles aren’t optional here. We traverse miles of talus, cross snowfields, and sidehill through terrain with little to no trail. That pole on your uphill side becomes critical for balance with a heavy pack. Poles also double as tent supports for cooking shelters and ultralight tents. I prefer cork handles and often use just one pole, though that’s personal preference. For Alaska’s challenging terrain, trekking poles make the difference between struggling and enjoying the trek.
Choosing the right backpack can make or break your Alaska adventure. After years guiding trips across remote terrain, I’ve learned that a modern backpack is technical equipment requiring knowledge to fit properly. Test any pack with 50 pounds for at least 10 minutes in-store, then field test it on an overnight trip before committing. My go-to packs are the Dana Designs Alpine (12+ years strong) and the Mystery Ranch G5000, both excel at carrying heavy loads on off-trail routes. Understanding strap adjustments, load distribution, and proper packing makes the difference between comfort and misery on week-long expeditions.

Discover the truth about layering for Alaska backpacking trips. Most hikers bring too many thin layers instead of one quality insulating piece. Learn why a single warm down jacket beats multiple lightweight layers, and get expert advice on staying comfortable in Alaska’s challenging backcountry conditions.
Alaska storms can last days. Guides explain why rain pants are essential for backpacking trips and which brands actually hold up in Alaska’s wet climate.
Honest comparison of down and synthetic sleeping bags from an Alaska guide with nearly 30 years of Alaska backpacking experience. Learn about fill power, brand recommendations, and why neither choice is wrong.
Choosing hiking boots for Alaska? Leather vs. synthetic, waterproofing, ankle support, and fit—here’s what actually matters when you’re carrying 60+ lbs over scree, talus, and tundra.
How to ask gear questions for a backpacking or outdoor adventure.

Essential guide to sleeping bags and pads for Alaska summer backpacking. Learn why 20°F bags are recommended, full-length zipper importance, and pad selection from a professional Alaska guide.
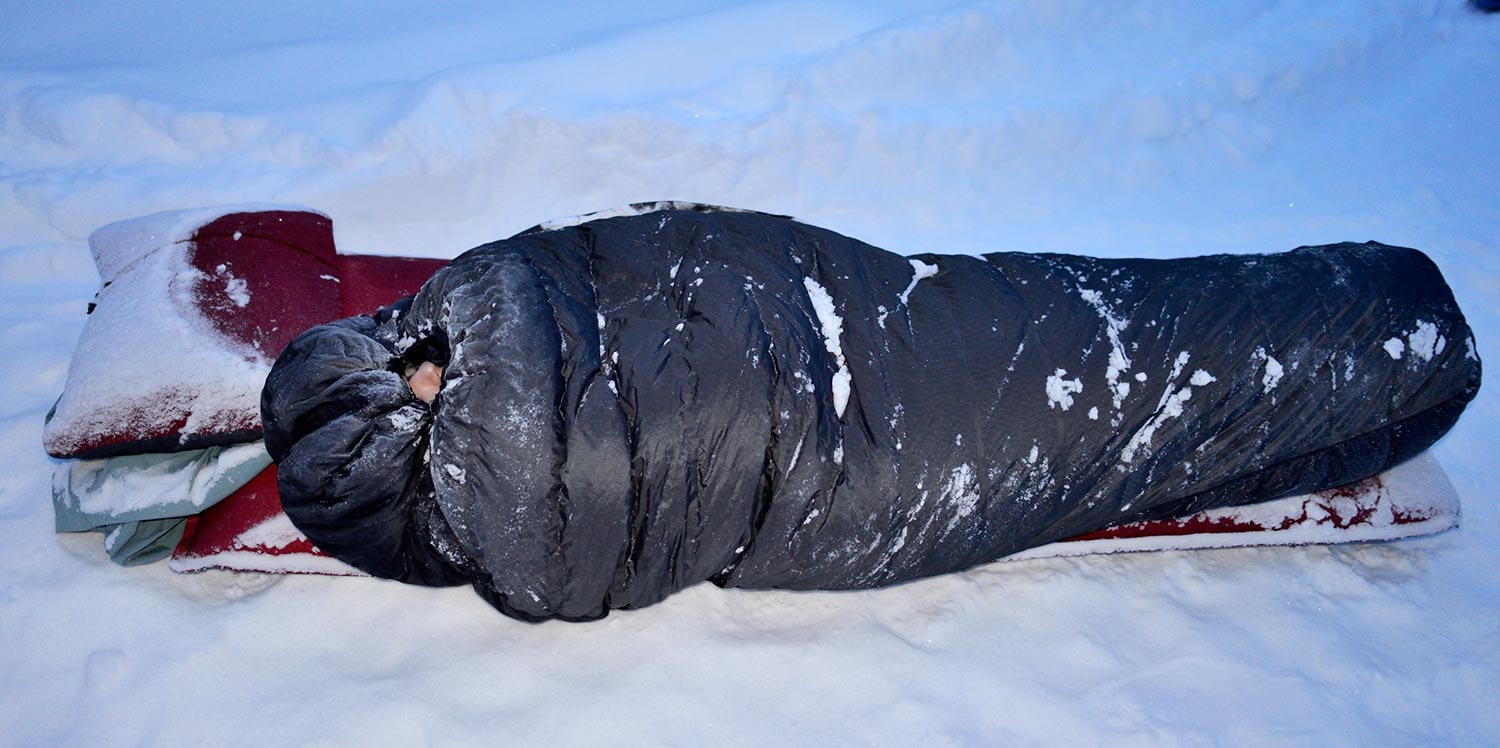
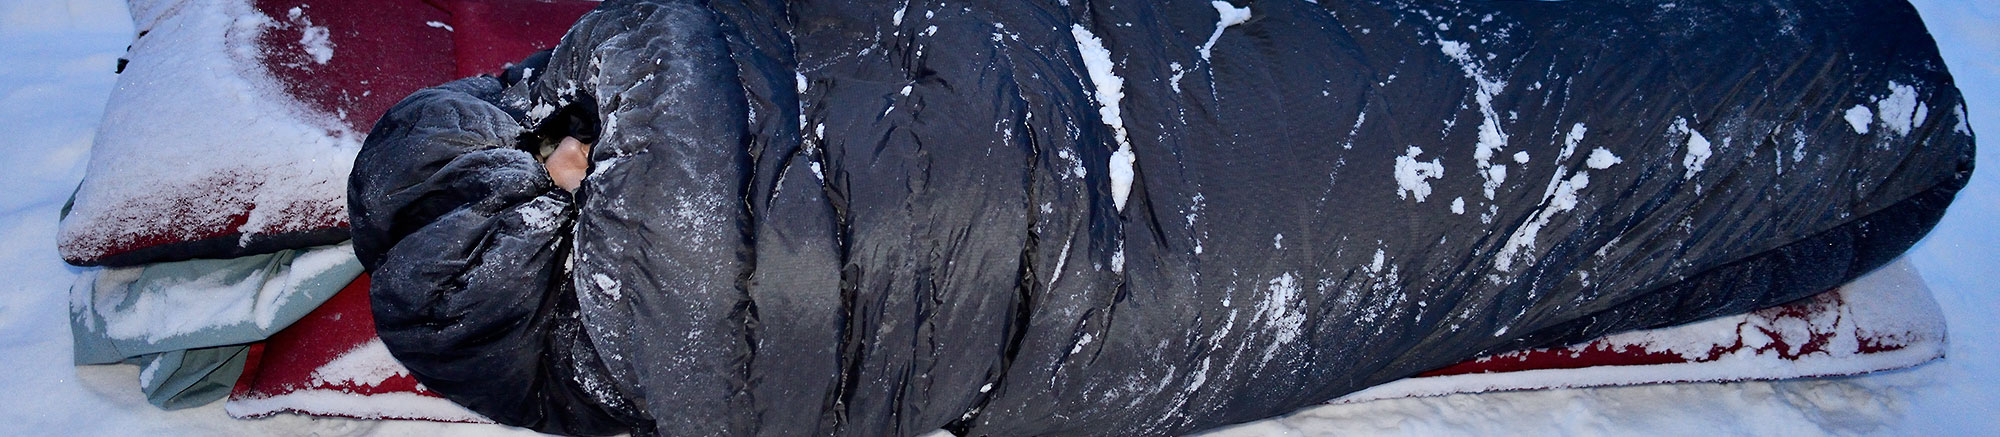
Winter camping in Alaska demands the right sleeping system. Temperatures drop to -30°F or colder. A quality sleeping bag rated 20 degrees below predicted temps, an insulated sleeping pad, and proper layering make the difference between a miserable night and sleeping soundly on snow.
Sleeping bag rating for a trip to Alaska. Bring a 20deg bag. A snowy campsite on the high alpine tundra of Wrangell-St. Elias National Park. Termination dust covers the ground, or fresh fall snow, and Mt Jarvis (13 421′) of the Wrangell Mountains stands dominating behind. Backcountry campsite, Wrangell-St. Elias National Park and Preserve, Alaska.